|
Tear Bear Instructions
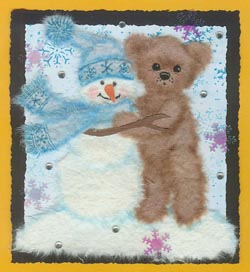
You have been looking for them, now you have them - Tear Bear Instructions. Scrapbookers everywhere are going crazy for tear bears and other animals. 
The following tear bear instructions will ensure that you can create your own scrapbooking embellishments worth showing off! List of Materials:Instructions:The first step in creating tear bears is to gather your materials. The most important material that you will need is Mulberry paper.
Mulberry Paper
If you would like to try making your paper try using this
Yasutomo Papyrus 21 Handmade Paper Making Kit.
After you have selected your paper, you will need to choose a bear pattern. You can find numerous free bear patterns through clipart collections and your son's coloring books. Or if you would like additional instruction and pattern, World Win offers a great book called The Tear Necessities Book . This book offers 25 full size patterns of characters like bears, ducks and bunnies. It also includes patterns for a train engine, a covered wagon and more! You will be using your selected pattern as a guide for transferring the bear shape onto your Mulberry paper. After selecting your bear pattern, cut the bear's body apart, that is each body part will be a separate piece. When selecting glue for your project, you will need to choose glue that is appropriate for the thickness of the paper you are using. If you are using heavy Mulberry paper, you can pretty much use any type of glue and be safe. However, if you are using a very thin or lightweight paper, the glue will need to be chosen carefully to ensure that it won’t show when dry. Rub on glue dots
To create your tear bear, you will begin by tracing around your bear pattern with chalk on the paper. Make sure that you leave an edge of between ½ to ¾ inches around the pattern’s edge. This will give you room to tear your shape and fluff up the edges. Once you have traced your pattern pieces, you will then need to begin the tearing process. Some people prefer to cut above the chalk lines, and then tear on the lines, as this makes the process simpler. To begin tearing, you will need to use the paintbrush or Q-tip and apply water to the pattern lines. Allow the water to soak completely through. Now, you will begin tearing out all of the pattern pieces. Once you have torn out all of your pieces, allow them to dry thoroughly. When they are completely dry, you will glue them creating your tear bear shape. Some papers will become fuzzier by tearing them towards you. It is best to experiment on scrap paper to determine the best way to create fuzziness on your paper. You can use a toothbrush to help fluff up the edges of your bear as well. Once you have your bear glued and assembled, you can add embellishments and other decorations. You may choose to use a previously purchased teddy bear face set, or create your own. There are a few of ways you can create your own teddy bear face. The first is the easiest! Mark the eyes and nose with a black felt tip pen. If you would like to add some dimension to your bear, consider cutting out the teddy bear's eyes and nose from black cardstock, or use a small
oval punch.
Or try these tear bear face stamps
You can make paws by using a paw paper punch. By using colored chalks and pens, you can add various shading to your bear as well. Find tons of tear bear supplies on eBay!
Not only will you enjoy the way tear bears look on your scrapbook page, you will also love following these tear bear instructions to create these fuzzy embellishments. Watch out, it may be addicting! After mastering the bear, try other animals!
Share your Tear Bear with Us!Have you made a Tear Bear or any other Tear Character? Please share it with us! See Tear Bears from Other Visitors!Click below to see Tear Bears that were created by other visitors to this page...
Tear Bear and the Bumble Bees
Torn Teddy
Winnie The Pooh Bear Not rated yet Heart Tear Bear
|


